Hygiene, Mobility, Skin Integrity and Core Skills
This is the chapter where assessment stops being something you look at and becomes something you do with your hands. Bathing a patient is the most complete skin survey anyone will perform that shift. Turning a patient is a pressure-injury intervention, a lung-expansion intervention and a circulation check at the same time. Walking a patient down the hall is a gait exam, an orthostatic screen and a fall-risk test rolled into one. The skills in this chapter — hygiene, positioning, safe patient handling, fall and restraint management, pressure-injury prevention and staging, medication administration and elimination care — are the ones that fill your first shifts, and they are also the ones most likely to harm someone if performed carelessly. A wrong water temperature, an unclamped drainage bag, a restraint tied to a side rail, a missed heel: each is a small technical error with a body attached to it. Learn the sequence, learn the numbers, and learn what you must never hand off.
By the end of this chapter you can
- Perform a bed bath, oral care, perineal care and foot care using correct clean-to-dirty sequence, and use the bath as a head-to-toe skin assessment.
- Describe the systemic complications of immobility and apply range-of-motion, positioning and progressive-mobility interventions to prevent them.
- Apply safe patient handling principles, including the 35-pound manual lift limit, gait-belt use and selection of the correct mechanical lift.
- Screen fall risk with the Morse Fall Scale and the Timed Up and Go, and carry out a correct post-fall response.
- State the legal definition of a restraint, the order and monitoring timeframes for violent and non-violent restraint, and safe application technique.
- Score the Braden Scale and stage a pressure injury as Stage 1 through 4, unstageable or deep tissue pressure injury, including in darkly pigmented skin.
- Administer medication using the rights of medication administration and the three checks, with two patient identifiers.
- Provide urinary and bowel elimination care, including CAUTI prevention, and perform abdominal assessment in the correct sequence.
- Distinguish what may be delegated to UAP from what must stay with the RN, and escalate a red-flag finding using SBAR.
Section 1Hygiene: The Most Thorough Assessment You Will Do All Shift
The bath is an assessment, not a chore
New nurses often think of the bath as the task you do before the real nursing starts. It is the other way around. During a complete bed bath you will see and touch the scalp, both ears, the neck, both axillae, the entire back, the sacrum, the perineum, the gluteal folds, both heels and the web spaces between every toe. There is no other routine activity that inspects those surfaces. Pressure injuries, incontinence-associated dermatitis, a heel that has turned boggy, a new rash under a breast, an untrimmed nail digging into a neighboring toe, a hearing aid that has been in for three days — all of it surfaces during the bath and nowhere else.
Work in an order and keep it the same every time so nothing gets skipped. Gather supplies first so you never leave the bedside. Raise the bed to your hip height and lower the side rail on your working side. Provide privacy, close the door, and keep the patient covered with a bath blanket, exposing only the region being washed — this preserves dignity and prevents chilling, which matters enormously in older adults. Water should be about 110–115°F (43–46°C); test it with a thermometer or the inner surface of your wrist, and use the cooler end of that range for anyone with diabetes, peripheral neuropathy, spinal cord injury or thin fragile skin who cannot reliably feel a burn. Change the water when it cools or becomes soapy.
The sequence is always clean to dirty. Eyes first, with no soap: use a separate corner of the washcloth for each eye and wipe from the inner canthus outward, so you never drag debris toward the tear duct. Then face, neck, arms with the far arm first, chest, abdomen, legs with the far leg first, back, and perineum last. Wash, rinse and dry each region completely before moving on — moisture trapped in the skin folds of the groin, under the breasts and in the pannus is where fungal rashes and moisture-associated skin damage begin. Pat dry; do not rub fragile skin. Apply moisturizer to dry areas, but never massage over a reddened bony prominence — friction over an already-injured microcirculation makes the injury worse.
Oral care, dentures and the patient who cannot protect an airway
Oral care is the hygiene task most often skipped and the one with the clearest link to hard outcomes. Dental plaque is colonized within days by respiratory pathogens, and micro-aspiration of that plaque is a principal route to hospital-acquired and ventilator-associated pneumonia. The evidence-based core is simple and unglamorous: brush the teeth with a soft toothbrush and fluoride toothpaste at least twice a day, including in intubated and comatose patients. Foam swabs alone do not remove plaque; they moisten. Routine chlorhexidine rinses, once standard in ventilator bundles, are no longer recommended for most non-cardiac-surgical patients — follow your facility protocol, but do not let a rinse substitute for a brush.
For the unconscious or dysphagic patient, positioning is the safety step. Place the patient in a side-lying position with the head turned toward you, or elevate the head of the bed and turn the head to the side, and keep suction on and within reach before you start. Use only a small amount of fluid, suction as you go, and never place your fingers between the teeth of a patient who may bite. Document the amount of secretions removed and the condition of the mucosa: pale, dry, cracked lips and a furrowed tongue point to dehydration; white plaques that scrape off point to candidiasis; spontaneous gingival bleeding raises the question of thrombocytopenia or anticoagulation.
Dentures are prostheses and are handled like them. Line the sink with a washcloth or fill it with water before you begin so a dropped denture does not shatter, and clean with cool or tepid water — hot water warps acrylic. Store dentures in a labeled, lidded container with water or denture solution, never wrapped in a tissue on the overbed table, which is how they end up in the laundry. Assess the underlying gums each time the dentures are out; a denture that has become loose after weight loss abrades the mucosa and causes ulcers that the patient will not mention.
Perineal care, foot care and shaving
Perineal care prevents infection and protects skin that is bathed in urine and stool. For a female patient, separate the labia and clean from the pubis toward the rectum in single downward strokes, using a clean section of the cloth for each stroke, and never returning upward — front to back, every time, because the female urethra is short — only about 4 cm long — and its meatus sits just centimeters from the anus. For a male patient, clean the tip of the penis in a circular motion beginning at the meatus and working outward. If the patient is uncircumcised, retract the foreskin, clean, and then replace the foreskin before you leave the bedside; a foreskin left retracted can swell and become entrapped, which is paraphimosis and a urologic emergency. Clean the scrotum and the perineum last.
Foot care is where a routine hygiene task becomes a limb-saving one. Inspect the soles, the heels and every web space, and ask the patient to look too or use a mirror at home. In patients with diabetes or peripheral arterial disease, do not soak the feet, do not use hot water, do not apply lotion between the toes, and do not cut the toenails — file straight across if permitted, and refer nail trimming to a podiatrist or an advanced clinician per policy. A single nick in a neuropathic, poorly perfused foot can become the ulcer that ends in amputation. For shaving, use an electric razor for any patient on anticoagulants, with thrombocytopenia, or with a bleeding disorder.
| What you find during hygiene | Expected | Abnormal — and what it suggests |
|---|---|---|
| Sacral skin after turning | Redness that blanches and resolves within 30 minutes of pressure relief | Non-blanchable erythema over the sacrum: Stage 1 pressure injury; purple or maroon discoloration: deep tissue pressure injury |
| Skin folds (groin, under breasts, pannus) | Dry, intact, same color as surrounding skin | Moist, macerated, bright red with satellite lesions: intertrigo or candidiasis, not pressure |
| Oral mucosa | Pink, moist, intact; tongue midline and moist | Dry and furrowed: dehydration. White adherent plaques: candidiasis. Bleeding gums: low platelets or anticoagulation |
| Heels | Skin intact, no tenderness, warm and equal to the other heel | Boggy, cooler, or a purple patch: developing deep tissue injury under an intact surface |
| Feet in diabetes | Warm, hair present, pulses palpable, no lesions | Cool, hairless, thin shiny skin, a painless ulcer over a pressure point: arterial disease with neuropathy — escalate |
| Perianal skin in an incontinent patient | Intact, dry between episodes | Diffuse red, weepy, poorly demarcated rash on the buttocks: incontinence-associated dermatitis, not a pressure injury |
How to chart it. Vague: “Bath given, skin ok.” Precise: “0930 Complete bed bath with assist of 1. Skin assessed head to toe. 2 cm area of non-blanchable erythema over left ischial tuberosity, intact, no induration, patient reports tenderness 3/10 with palpation. All other surfaces intact. Repositioned to right 30-degree lateral, heels floated on pillow, offloading schedule initiated q2h. Braden rescored 14. Wound care consult requested via order entry.”
Hygiene is the only routine activity that inspects and touches every square inch of the patient, so treat the bath as a scheduled full-body assessment that you own even when someone else does the washing.
Section 2Mobility, Positioning and Safe Patient Handling
What immobility does, system by system
Bed rest is a treatment with a dose-dependent toxicity, and the toxicity begins on day one. Skeletal muscle strength falls roughly 1 to 1.5 percent per day of strict bed rest, so a week of immobility can cost close to ten percent of a patient’s strength; bone demineralizes at about one percent per week; plantar flexion contracture — foot drop — can become fixed within a week or two without positioning and range of motion. In the lungs, supine positioning plus shallow breathing collapses dependent alveoli and pools secretions, producing atelectasis first and pneumonia after. In the vasculature, venous stasis joins endothelial injury and hypercoagulability to complete Virchow’s triad, and venous thromboembolism follows.
Autonomic reflexes deteriorate as well, which is why a patient who was fine three days ago becomes lightheaded the first time you stand them up. Orthostatic hypotension is a fall in systolic pressure of at least 20 mmHg or in diastolic pressure of at least 10 mmHg within three minutes of standing. Measure it deliberately: blood pressure and pulse supine after five minutes of rest, then again at one minute and three minutes after standing. A pulse rise of more than 20 beats per minute with the pressure drop points toward volume depletion rather than pure autonomic failure. Elsewhere, gut motility slows and constipation follows, urine stagnates in a flat renal pelvis and predisposes to stasis, infection and calculi, and unrelieved interface pressure begins the pressure-injury cascade covered in Section 4.
The intervention is not rest — it is progressive mobility, started early and escalated by protocol: passive range of motion, to active-assist, to dangling at the edge of the bed, to standing, to chair, to ambulation. Get the patient out of bed for meals. Ambulate at least three times a day if the plan allows. Use incentive spirometry ten times an hour while awake, apply sequential compression devices when ordered, and reposition on a schedule. Do not use the Homans sign to screen for deep vein thrombosis; it is neither sensitive nor specific, and squeezing a calf that contains a clot is not a clever idea.
Positioning, range of motion and the dangle
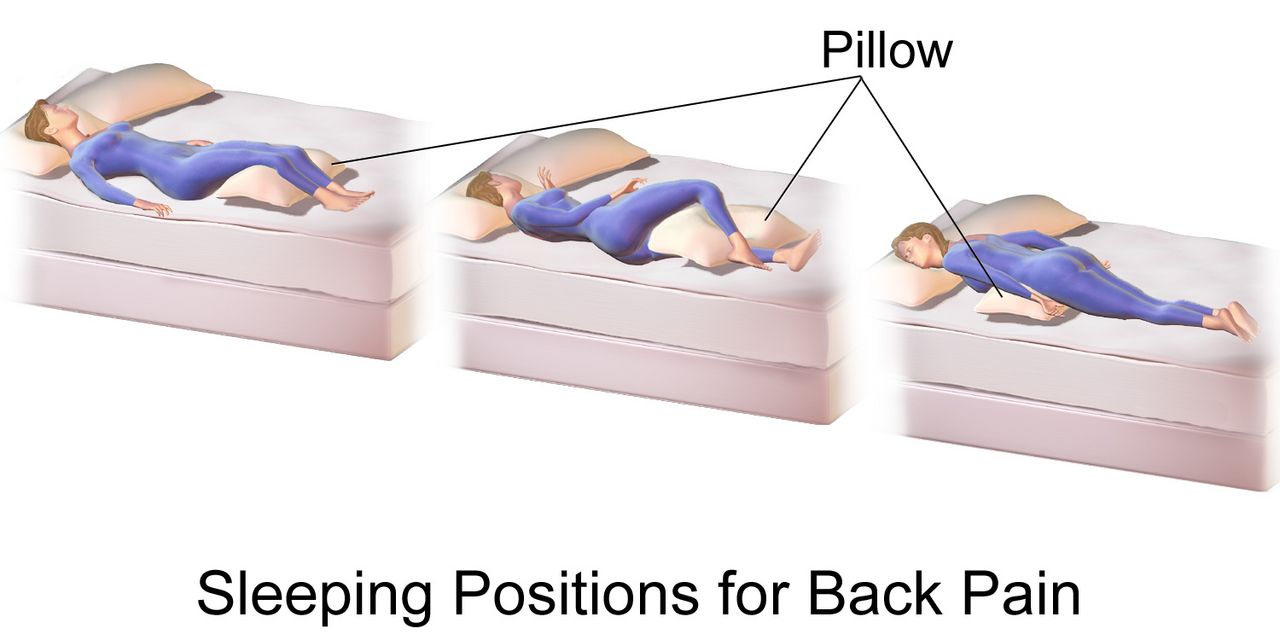
Positions have names because those names carry angles, and the angles carry consequences. Know them cold, because a provider order will say “semi-Fowler” and expect you to produce it.
| Position | Description | Used for — and the caution |
|---|---|---|
| Supine | Flat on the back, head of bed 0° | Spinal alignment, post-procedure. Highest sacral and heel pressure — float heels |
| Semi-Fowler | Head of bed 30–45° | Aspiration prevention, tube feeding, respiratory ease; 30° is the ceiling for pressure-injury prevention unless clinically required |
| Fowler / High Fowler | 45–60° / 60–90° | Dyspnea, meals, suctioning; above 30° shear on the sacrum rises sharply |
| 30° lateral side-lying | Rolled a third of the way over with pillows behind the back | The preferred turn. Avoid true 90° side-lying, which loads the greater trochanter directly |
| Sims | Left side-lying, lower arm behind, upper knee flexed | Enemas, suppositories, rectal exam, unconscious patient drainage |
| Prone | Face down, head turned | Refractory hypoxemia (proning); guard eyes, breasts, genitals, and pad the face |
| Trendelenburg | Whole bed tilted head-down | Rarely indicated; raises intracranial pressure and worsens ventilation — do not use routinely for hypotension |
Range of motion keeps joints from becoming the reason a recovered patient cannot go home. Perform passive range of motion when the patient cannot move a limb, active-assist when they can partially, and active when they can. Support the joint above and below, move slowly and smoothly through the available arc, repeat each movement three to five times, two or three times daily, and stop at the point of resistance or pain — never force a joint. Build it into the bath so it actually happens. Prevent foot drop with a foot board, high-top shoes or a splint per order, and prevent hip external rotation with a trochanter roll.
Before any patient stands for the first time in days, dangle. Raise the head of the bed, pivot the patient to sitting at the edge with feet flat on the floor, and let them sit for one to five minutes while you take a pulse and ask about dizziness. Apply nonskid footwear and the gait belt while they sit. If they report lightheadedness, blur or nausea, or the pulse jumps, lay them back down and recheck orthostatic vital signs. The dangle costs sixty seconds; the fall it prevents costs a hip.
Transfers, gait belts and mechanical lifts
Manual patient lifting is the leading cause of career-ending back injury in nursing, and the arithmetic is not close. The recommended maximum weight a single caregiver should manually lift, under ideal conditions, is 35 pounds (about 16 kg). Almost no adult patient weighs 35 pounds. That means the correct answer to “how do I move this patient” is usually equipment plus a second person, not better body mechanics. Choose by weight-bearing ability: a patient who can bear no weight or who is uncooperative requires a full-body mechanical lift with two staff; a patient who can bear partial weight, is cooperative and has upper-body strength may use a sit-to-stand lift; a patient who can bear full weight and follow directions may transfer with a gait belt and stand-by assist. Friction-reducing slide sheets and air-assisted lateral transfer devices are for bed-to-stretcher moves.
Body mechanics still matter for the moves that remain. Raise the bed to hip height while working and lower it to its lowest position when you leave. Stand with feet shoulder-width apart, one foot slightly ahead, for a wide base. Bend at the hips and knees, not the waist. Keep the load close to your center of gravity. Pivot with your feet — never twist your spine. Push or slide rather than lift. Face the direction of movement, count out loud so everyone moves together, and name one person as the leader.
Apply a gait belt over clothing, snug around the waist with room for two fingers underneath, buckle to the front or side. Do not use a gait belt over an abdominal incision, colostomy, feeding tube, chest tube, recent abdominal aortic aneurysm repair, or a pregnant abdomen — use an alternate device or a lift. When ambulating, stand on the patient’s weaker side, slightly behind, with one hand grasping the belt underhand at the back and the other near the shoulder. If the patient begins to fall, do not try to hold them upright. Pull them toward your body, ease them down along your leg to the floor while protecting the head, call for help, and assess before you move them.
| Device or maneuver | The rule |
|---|---|
| Cane | Held on the strong (unaffected) side. Handle at hip/greater trochanter level, elbow flexed about 15–30°. Advance cane and weak leg together, then the strong leg |
| Walker | Advance the walker 6–12 inches, step in with the weak leg, then the strong leg. All four points on the floor before stepping. Do not use a standard walker on stairs |
| Crutches | Weight on the hands, never the axillae — axillary pressure causes brachial plexus palsy. Two to three finger widths between axilla and crutch pad |
| Stairs | Up with the good leg first; down with the bad leg and the crutches or cane first |
| Wheelchair transfer | Chair on the patient’s strong side at a 45° angle, brakes locked, footrests up and out of the way, patient’s feet flat, pivot on the strong leg |
Immobility injures every organ system within days, so mobilize early and by protocol — and when you move a patient, let equipment carry the load, because 35 pounds is the honest limit of what one nurse should lift.
Section 3Falls, Restraints and the Least-Restrictive Envelope
Screening fall risk with real numbers
Falls are the most common adverse event in hospitals, and roughly a third of inpatient falls cause injury. Screening is done on admission, at every transfer of care, after any change in condition, after a fall, and at least each shift in most facilities. The Morse Fall Scale is the most widely used inpatient tool and scores six items: history of falling in the past three months (25 points), a secondary medical diagnosis (15), ambulatory aid — none, bed rest or nurse-assisted 0, crutches, cane or walker 15, holding onto furniture 30 — an intravenous line or saline lock (20), gait — normal, bed rest or wheelchair 0, weak 10, impaired 20 — and mental status, where a patient oriented to their own ability scores 0 and one who overestimates or forgets limitations scores 15. The total runs 0 to 125. The published cut-offs are 0–24 no risk, 25–44 low to moderate risk and 45 or higher high risk, though facilities calibrate their own thresholds. The Hendrich II tool is the other common instrument, with a score of 5 or more indicating high risk.
Two performance tests add information a paper score cannot. In the Timed Up and Go, the patient rises from a standard armchair, walks 10 feet (3 meters), turns, walks back and sits down; 12 seconds or longer indicates increased fall risk. The 30-second chair stand and the 4-stage balance test round out the CDC screening battery. Do not forget the medication review, which is often the highest-yield intervention: benzodiazepines, opioids, antipsychotics, antihypertensives, diuretics, hypoglycemics, anticholinergics and sedative-hypnotics all raise risk, and risk climbs steeply with four or more medications.
Note that the score is not the plan. A Morse score of 50 tells you the patient is high risk; it does not tell you whether the reason is orthostasis, an untreated urinary urgency, poor lighting, a new opioid or an unfamiliar walker. Interventions must match the mechanism.
The prevention bundle and the post-fall response
The bundle is unglamorous and it works. Bed in the lowest position and locked. Call light, phone, water and glasses within reach and demonstrated, not just placed. Nonskid footwear whenever out of bed. Adequate lighting, night light on, clutter and cords cleared, spills wiped immediately. Purposeful hourly rounding using the four Ps — pain, potty, position and possessions — because the most common fall is a patient trying to reach a bathroom alone. Toileting on a schedule for anyone with urgency, delirium or diuretics. Bed and chair alarms per policy, high-risk identifiers on the door and wristband, and a room near the nurses’ station for the highest-risk patients. Note that alarms alone have not been shown to reduce falls; they are a supplement to rounding, not a replacement.
If a patient does fall, the sequence protects them from a second injury. Do not move the patient first. Stay with them, call for help, and assess in place: level of consciousness, ability to move all extremities, pain, obvious deformity, head strike, and whether the fall was witnessed. Take a full set of vital signs including orthostatics when safe, check a blood glucose if the mechanism is unclear, and perform neurologic checks — especially in a patient on an anticoagulant, where a head strike is a potential intracranial bleed regardless of how well they look right now. Only after injury has been evaluated do you move them, with a lift and adequate staff. Notify the provider and the family, and initiate the frequency of neuro and vital sign checks that policy specifies.
How to chart it. Vague: “Patient found on floor. Incident report filed. Provider notified.” Precise: “0215 Unwitnessed fall. Patient found sitting on floor at right side of bed, bed in low position, call light on bed rail, nonskid socks on. Patient states ‘I was going to the bathroom.’ Alert and oriented x3, denies head strike, denies LOC. No deformity; ROM intact all extremities; reports 4/10 right hip pain with movement. VS 138/76, HR 92, RR 18, T 36.8 C, SpO2 96 percent RA, CBG 104. Neuro checks initiated q15 min x 4. Assisted to bed with 2 staff and full-body lift. Dr. Okonkwo notified 0222 via SBAR; hip and pelvis x-ray ordered. Morse rescored 55; bed alarm activated, scheduled toileting q2h initiated. Daughter notified 0240.” Note what is absent: an incident report is a quality document and is never referenced in the medical record.
Restraints: the legal definition, the order rules, the monitoring
A restraint is any manual method, physical or mechanical device, material or equipment that immobilizes or reduces the ability of a patient to move the arms, legs, body or head freely, or any drug used to manage behavior or restrict freedom of movement that is not a standard treatment for the patient’s condition. That definition catches things students do not expect: all four side rails raised is a restraint; a tucked-in sheet that prevents a patient from getting up is a restraint; a chair with a locking tray is a restraint. Two half rails raised so a patient can reposition themselves is not. A restraint is always the last resort after less restrictive alternatives have been tried and documented — sitter, family presence, orientation, toileting, pain relief, hearing aids and glasses, activity, lighting, reducing tethers, moving the patient nearer the station.
Restraints require an order from a physician or authorized licensed independent practitioner. PRN or standing restraint orders are prohibited. In an emergency a nurse may initiate restraint to protect the patient or others, but an order must be obtained immediately after, and a face-to-face evaluation must occur within one hour for violent or self-destructive restraint. The time limits differ by indication and by age.
| Element | Non-violent / non-self-destructive (medical-surgical) | Violent / self-destructive (behavioral) |
|---|---|---|
| Typical indication | Protecting a medical device — endotracheal tube, central line, surgical drain — in a confused patient | Imminent risk of harm to self or others |
| Order duration | Renewed per hospital policy, at minimum each calendar day after in-person re-evaluation | Adults 18 and older: 4 hours. Ages 9–17: 2 hours. Under 9 years: 1 hour. Renewable to a maximum of 24 hours, then a new in-person evaluation |
| Face-to-face evaluation | Per policy | Within 1 hour of initiation by a physician, LIP or trained RN |
| Monitoring | Assess at least every 2 hours: circulation, sensation, skin, range of motion, position, hydration, nutrition, toileting | Continuous monitoring; documented assessment at least every 15 minutes per policy |
| Release | Release, reposition, provide ROM and toileting at least every 2 hours | Release at the earliest possible moment; discontinue as soon as behavior criteria are met, without waiting for the order to expire |
Application technique is a safety skill. Use the least restrictive device that works. Pad bony prominences. Apply so that two fingers slide easily between the restraint and the skin. Secure with a quick-release knot — never a square knot — and tie to the movable bed frame, never to a side rail, because a rail that is lowered will torque or crush the limb. Keep the call light in the patient’s hand. Never leave a restrained patient alone in a room with the door closed unless continuous observation is in place. Document the behavior that necessitated restraint in objective, observable terms, the alternatives attempted and their failure, the order, the type and location of device, the release and reassessment times, and the criteria for discontinuation.
Screen fall risk with a validated score but treat the mechanism, assess a fallen patient before moving them, and treat restraint as a time-limited, ordered, continuously reassessed last resort — never a convenience.
Section 4Skin Integrity: The Braden Scale and Pressure Injury Staging
Assessing skin: the technique, and getting it right in every skin tone
Skin assessment follows the same order as every other regional exam — inspection first, then palpation — with adequate light and the surface fully exposed. Inspect for color, symmetry, moisture, lesions and hair distribution; then palpate for temperature with the dorsum of your hand, for texture, for turgor (over the sternum or forehead in older adults, since the back of the hand tents with age regardless of hydration), for edema (press over a bony prominence for at least five seconds), and for induration or bogginess. Systematically inspect every pressure point: occiput, ears, scapulae, elbows, spine, sacrum, coccyx, ischial tuberosities, greater trochanters, knees, malleoli and heels — plus every site touching a medical device, because oxygen tubing, cervical collars, endotracheal tube holders, pulse oximetry probes, casts and compression devices produce medical-device-related pressure injuries in the shape of the device.
The most consequential equity failure in this chapter is missing early pressure injury in patients with darker skin, who are demonstrably more likely to present at Stage 3 or 4 because Stage 1 was never seen. Non-blanchable erythema is described as red, but in darkly pigmented skin early pressure damage more often appears as an area that is simply darker-than-surrounding — gray, ashen or deeper in tone — and blanching may not be observable at all. Read the colour carefully, because it decides the stage rather than merely the detection: intact skin that is darker, gray or ashen than the surrounding tissue, with a change in temperature, firmness, sensation or pain, is a Stage 1; persistent purple, maroon or deep red discoloration over intact skin is not a Stage 1 but a deep tissue pressure injury, which carries a faster, more urgent escalation. So do not rely on color alone. Use temperature (compare the site with the mirror-image site on the other side using the back of your hand — early injury is often warmer, later injury cooler), consistency (boggy, mushy or firm compared with surrounding tissue), pain reported at the site, and moisture changes. Use natural or bright white light rather than yellow overhead light. Assess a patient’s general color changes where pigment is thin: cyanosis and pallor at the oral mucosa, conjunctivae, palms and soles and nail beds; jaundice at the sclera, hard palate and palms; erythema by warmth and tightness as much as by redness.
Lifespan matters too. Infants have a thin stratum corneum, a proportionally large occiput that becomes the number-one pressure site, and near-total device-related injury risk from probes and tubing. Children from about 21 days to 8 years of age should be scored with the Braden Q scale rather than the adult Braden. In pregnancy, positioning is left lateral tilt to avoid aortocaval compression, and edema and striae are expected. Older adults lose dermal thickness, subcutaneous fat over the trochanters and sacrum, elastin and sebum, so skin tears from tape and shear become a distinct injury category, and turgor is unreliable. Assess older skin gently, use silicone or paper tape, and lift rather than drag every single time.
The Braden Scale: what the number actually means
The Braden Scale for Predicting Pressure Sore Risk is scored on admission, then per policy — commonly every 24 hours on medical-surgical units, every shift in critical care — and again with any change in condition. It has six subscales. Five of them — sensory perception, moisture, activity, mobility and nutrition — score 1 to 4, and friction and shear scores 1 to 3. The total therefore ranges from 6 to 23, and here the counterintuitive part: a lower score means higher risk.
| Subscale | Range | What a low score is telling you |
|---|---|---|
| Sensory perception | 1–4 | The patient cannot feel or report discomfort — sedation, neuropathy, spinal cord injury, dementia |
| Moisture | 1–4 | Skin is constantly damp from incontinence, diaphoresis or wound drainage |
| Activity | 1–4 | Bedfast or chairfast |
| Mobility | 1–4 | Cannot make even slight changes in body or extremity position without help |
| Nutrition | 1–4 | Poor intake, NPO status, low albumin/prealbumin, unintentional weight loss |
| Friction and shear | 1–3 | Slides down in bed, requires maximum assist to move, spasticity or agitation |
| Total 19–23 no risk · 15–18 mild risk · 13–14 moderate risk · 10–12 high risk · 9 or below very high risk | ||
Two habits separate a nurse who uses Braden from a nurse who documents Braden. First, read the subscales, not just the total, because each low subscale names its own intervention: moisture of 1 means a barrier cream and a containment plan, nutrition of 2 means a dietitian consult, friction and shear of 1 means a slide sheet and a 30-degree head-of-bed limit. Second, remember the tool is a screen, not a verdict. A patient with a Braden of 20 who is going to the operating room for eight hours on a hard table, or who has a cast, or who is on vasopressors, is at real risk that the score does not capture. Clinical judgment overrides the number upward, never downward.
Staging: the deepest visible tissue defines the stage
Staging describes anatomy, not severity of appearance. Look at the deepest tissue you can actually see or palpate in the wound bed. If you cannot see the base, you cannot stage it.
| Stage | Defining features | Do not confuse it with |
|---|---|---|
| Stage 1 | Intact skin with localized non-blanchable erythema. In darker skin the area may not look red — look for skin that is darker, gray or ashen than the surrounding tissue; may be preceded by change in temperature, firmness, sensation or pain. Colour changes do not include purple or maroon | Blanchable reactive hyperemia, which resolves within about 30 minutes of offloading — and deep tissue pressure injury, because purple, maroon or deep red over intact skin is a DTPI, never a Stage 1 |
| Stage 2 | Partial-thickness loss with exposed dermis. Wound bed viable, pink or red, moist; may be an intact or ruptured serum-filled blister. No adipose, granulation tissue, slough or eschar | Incontinence-associated dermatitis, skin tears, tape injury, burns, abrasions — none of these are staged |
| Stage 3 | Full-thickness loss; adipose (fat) is visible. Granulation tissue and rolled edges (epibole) common; slough or eschar may be present but the base is visible. Undermining and tunneling may occur. Fascia, muscle, tendon, ligament, cartilage and bone are not exposed | Stage 4 — the discriminator is whether deeper structures are exposed or palpable |
| Stage 4 | Full-thickness skin and tissue loss with exposed or directly palpable fascia, muscle, tendon, ligament, cartilage or bone. Epibole, undermining, tunneling often present | Osteomyelitis is a complication, not a separate stage — escalate |
| Unstageable | Full-thickness loss in which the base is obscured by slough or eschar. Once debrided it will prove to be Stage 3 or 4 | Stable, dry, adherent eschar on a heel or an ischemic limb with no erythema, fluctuance or drainage is the body’s biologic cover — do not soften or remove it |
| Deep tissue pressure injury | Persistent non-blanchable deep red, maroon or purple discoloration of intact or non-intact skin, or epidermal separation revealing a dark wound bed or blood-filled blister. Pain and temperature change often precede the color change | A bruise. DTPI is not assigned a number; it may resolve or may deteriorate to Stage 3 or 4 within days |
Two additional categories exist. A medical-device-related pressure injury is staged with the same system and takes the shape of the device. A mucosal membrane pressure injury — from an endotracheal tube, a nasogastric tube, an indwelling catheter — cannot be staged, because mucosa has no keratinized epidermis or dermis to compare. Finally, pressure injuries do not reverse-stage. A healing Stage 4 that has filled with granulation tissue is documented as a “healing Stage 4 pressure injury,” never as a Stage 2, because the lost muscle and fat are replaced by scar, not by the original tissue.
Prevention that actually works
Reposition patients in bed at least every two hours and patients in a chair at least every hour — chair sitting concentrates enormous pressure on the ischial tuberosities, so teach capable patients to shift weight every 15 minutes. Turn to 30-degree lateral, not 90 degrees over the trochanter, and keep the head of bed at or below 30 degrees unless a clinical reason requires more, because higher elevation slides the skeleton down inside the skin and shears the sacral capillaries. Float the heels completely off the mattress on a pillow placed lengthwise under the calves with the knees slightly flexed; heels have almost no subcutaneous padding and are the second most common site after the sacrum. Use a pressure-redistributing surface for at-risk patients. Never use ring or donut cushions — they create a circle of ischemia around the very tissue you are protecting.
Manage moisture and nutrition as aggressively as pressure. Cleanse after each incontinence episode with a pH-balanced cleanser rather than soap, apply a barrier cream or film, and consider a containment strategy — but note that an indwelling catheter is not a pressure-injury intervention and trades one hospital-acquired infection for another. Involve a dietitian early; adequate protein and calories are the substrate for every repair. Use lift sheets and slide boards to eliminate dragging, keep linens dry and wrinkle-free, and inspect at every turn. And do not massage over bony prominences or reddened areas.
How to chart it. Vague: “Bedsore on bottom, dressing changed.” Precise: “1400 Sacral pressure injury, Stage 3, 3.5 cm x 2.8 cm x 0.6 cm deep, 100 percent red granulation, no slough, no undermining or tunneling detected with sterile probe. Moderate serosanguineous drainage, no odor. Periwound intact, no erythema, no induration. Patient reports 3/10 pain at dressing change, premedicated at 1330. Hydrocolloid applied per order. Braden 11 (sensory 2, moisture 1, activity 1, mobility 2, nutrition 3, friction/shear 2). Turn schedule q2h, heels floated, 30-degree lateral, HOB at 25 degrees. Dietitian consult in place.”
Score the Braden subscales as an intervention list rather than a number, stage by the deepest visible tissue, and never let redness be your only clue — in darker skin, temperature, firmness and pain are what find a Stage 1 before it becomes a Stage 4.
Section 5Core Skills: Medications, Elimination, Delegation and Escalation
The rights of medication administration and the three checks
Medication administration is a series of deliberate verifications, and skipping any one of them is how a fatal error happens quietly. The classic five rights are right patient, right drug, right dose, right route, right time. Contemporary practice adds right documentation, right reason (indication), right response (evaluation), right to refuse and right education. The rights are a framework, not a system — they tell you what to verify, while barcode scanning, independent double checks and pharmacy review are what make verification reliable.
Verify the drug against the medication administration record three times: when you take it from the storage or dispensing unit, when you prepare it and compare with the record, and again at the bedside immediately before giving it. Identify the patient with two identifiers — full name and date of birth, or name and medical record number. A room number is never an identifier. Scanning the wristband does not replace asking the patient to state their name and date of birth. Never give a medication you did not personally prepare, never leave medications at the bedside, and never chart a medication before it has been swallowed or infused.
A handful of specific rules prevent a disproportionate share of harm. High-alert medications — insulin, heparin and other anticoagulants, opioids, concentrated electrolytes, chemotherapy, neuromuscular blockers — require an independent double check by a second nurse per policy. Time-critical scheduled medications must be given within 30 minutes before or after the scheduled time; non-time-critical medications typically allow one to two hours per policy. Do not crush enteric-coated or extended-release tablets or open most capsules; check a “do not crush” list. For medications given by enteral tube, verify tube placement, elevate the head of bed at least 30 degrees, give each medication separately, and flush with 15–30 mL of water before, between and after. Avoid dangerous abbreviations: write “unit” not U, “daily” not QD, “every other day” not QOD, always use a leading zero (0.5 mg, never .5 mg) and never a trailing zero (5 mg, never 5.0 mg), because a misread decimal is a tenfold error. If a patient questions a medication — “that pill is usually pink” — stop and verify. The patient is often right.
If an error occurs, the order is fixed: assess the patient first, take vital signs, notify the provider, follow orders for monitoring or reversal, document the facts objectively in the chart, and complete the occurrence report separately.
Urinary elimination, catheters and CAUTI prevention
Know the numbers. A healthy adult produces about 1,200–1,500 mL of urine per day; the acceptable floor is 0.5 mL/kg per hour, and urine output of less than 30 mL per hour for two consecutive hours in an adult is a reportable finding. Oliguria is less than 400 mL in 24 hours and anuria less than 100 mL in 24 hours. Adult bladder capacity is roughly 300–600 mL, with the first urge felt around 150–300 mL. A bladder scan post-void residual above 100 mL deserves attention, and above about 200 mL is abnormal and usually triggers a straight catheterization protocol. Urine should be clear to amber; cloudy, malodorous, or dark tea-colored urine, or any frank blood, is abnormal.
An indwelling catheter is the single most modifiable cause of a hospital-acquired infection, so the first CAUTI intervention is to not place one. Legitimate indications are narrow: acute urinary retention or obstruction, accurate measurement in critically ill patients, selected perioperative needs, healing of Stage 3, 4 or unstageable perineal wounds in an incontinent patient, prolonged immobilization for trauma, and comfort at end of life. Incontinence alone, staff convenience and routine intake and output are not indications. If one is placed, insert with sterile technique: in a female patient, insert 5–7.5 cm (2–3 inches) until urine returns, then advance another 2.5–5 cm before inflating; in a male patient, hold the penis at a 90-degree angle and insert 17–22.5 cm (7–9 inches) until urine returns, then advance to the bifurcation. Inflate the balloon with the volume of sterile water printed on the balloon port, never with saline or air.
Maintenance is where infections are actually prevented. Keep the collection system closed and never disconnect it for convenience. Keep the bag below the level of the bladder at all times, including during transfers, and never on the floor. Keep the tubing free of dependent loops and kinks. Secure the catheter to the thigh or lower abdomen to prevent traction on the urethra. Perform routine meatal care with soap and water — antiseptics are not recommended and irritate the mucosa. Empty the bag with a patient-dedicated container before it is two-thirds full. Obtain specimens from the sampling port after disinfecting it, never from the drainage bag. And review the necessity every single day, because the strongest predictor of infection is the number of catheter-days.
Bowel elimination, ostomy care and the abdominal sequence
Before you give an enema, insert a rectal suppository, or evaluate constipation, assess the abdomen — and here the general exam sequence changes. Everywhere else in the body the order is inspection, palpation, percussion, auscultation. For the abdomen the order is inspection, auscultation, percussion, palpation, because percussing or palpating first mechanically stimulates the bowel and alters the bowel sounds you are about to count. Inspect contour, symmetry, distention, scars, stoma and visible peristalsis. Auscultate all four quadrants with the diaphragm, starting in the right lower quadrant near the ileocecal valve; normal sounds are irregular gurgles 5 to 30 times a minute, and you must listen a full five minutes in one quadrant before you may document absent bowel sounds. Then percuss for tympany over gas and dullness over organs or masses, and palpate lightly (about 1 cm) before deeply (4–5 cm), tender areas last. High-pitched tinkling or rushes with cramping suggests early obstruction; silence with a rigid, board-like abdomen suggests peritonitis and is a call-now finding.
Normal stool frequency ranges from three times a day to three times a week, and the Bristol Stool Form Scale is how you describe it: types 1 and 2 (hard lumps, lumpy sausage) indicate constipation, types 3 and 4 (cracked sausage, smooth snake) are normal, and types 5 through 7 (soft blobs, mushy, liquid) trend toward diarrhea. Watch for the classic trap: a patient who has had no formed stool for days and now has continuous small liquid leakage is not having diarrhea — that is likely fecal impaction with overflow, and giving an antidiarrheal will make it dangerous. Digital removal of an impaction requires an order and carries a real risk of vagal stimulation with bradycardia; stop immediately if the pulse drops or the patient becomes lightheaded.
For a cleansing enema, place the patient in the left Sims position with the right knee flexed, which follows the natural curve of the sigmoid colon. Solution should be about 105–110°F (40.5–43°C) — hot solution burns mucosa, cold solution causes cramping. Adult volume is typically 750–1,000 mL. Lubricate and insert the tube 7.5–10 cm (3–4 inches) in an adult, 5–7.5 cm in a child and 2.5–3.75 cm in an infant, aiming toward the umbilicus, and never force against resistance. Hang the bag about 30–45 cm (12–18 inches) above the anus and instill slowly; if the patient cramps, lower the bag and pause, do not stop and pull out. Ask the patient to retain the solution 5–15 minutes. Repeated tap-water enemas can cause water intoxication and hyponatremia, particularly in children and older adults, and hypertonic phosphate enemas can cause dangerous hyperphosphatemia in renal impairment.
Assess an ostomy every time you change the pouch. A healthy stoma is beefy red or pink, moist and budded slightly above skin level, and it is insensate, so slight bleeding with cleansing is expected. A pale stoma suggests anemia; a dusky, purple, brown or black stoma means ischemia and is an emergency. Cut the barrier opening about 1/8 inch (3 mm) larger than the stoma so effluent does not touch skin and the barrier does not constrict it. Empty the pouch when it is one-third to one-half full so weight does not break the seal. Ileostomy output is liquid to pasty and typically 500–1,000 mL daily; sustained output above roughly 1,200 mL per day is a dehydration and electrolyte emergency in the making. A colostomy in the descending or sigmoid colon produces formed stool.
Delegation, red flags and the SBAR call
Delegation is a nursing skill with a legal edge. Use the five rights of delegation — right task, right circumstance, right person, right direction and communication, right supervision and evaluation. The RN may delegate a task; the RN may never delegate the nursing process. Assessment, nursing diagnosis, planning, patient teaching and evaluation of response stay with the RN, as does any care for an unstable or unpredictable patient, and the accountability for the outcome stays with the RN regardless of who performed the task.
| May be delegated to UAP | Stays with the RN (or LPN/LVN per state scope) |
|---|---|
| Bathing, oral care, perineal care and shaving for a stable patient | The skin assessment and Braden scoring performed during that bath |
| Turning and repositioning on an established schedule; passive ROM already taught | Deciding the turning schedule, evaluating whether it is working, staging a wound |
| Ambulating a stable patient with an established plan and device | The first ambulation, any post-operative or newly-unsteady patient, and any gait assessment |
| Vital signs on a stable patient; recording intake and output; emptying drainage bags | Interpreting the vital signs and acting on them; evaluating urine output trends |
| Feeding a patient without swallowing risk; setting up meals; measuring weights | Feeding anyone with dysphagia; nutrition assessment; teaching |
| Applying nonskid footwear, activating a bed alarm, keeping call light in reach | Fall-risk scoring, restraint initiation and assessment, post-fall assessment |
| Assisting with a bedpan, emptying an ostomy pouch (per policy) | Medication administration, sterile catheter insertion, first ostomy assessment and teaching, nail care in a diabetic patient |
Now the findings that mean stop and call. Adult reference values for context: temperature 36.5–37.5°C (97.7–99.5°F) orally, heart rate 60–100, respiratory rate 12–20, blood pressure under 120/80, oxygen saturation 95–100 percent on room air. Ranges shift by age — newborn heart rate 100–160 and respiratory rate 30–60; infant 100–160 and 30–53; toddler 90–140 and 22–37; preschooler 80–120 and 20–28; school-age 70–120 and 18–25; adolescent and adult 60–100 and 12–20. In older adults the baseline temperature runs lower, so an oral temperature of 37.2°C (99°F), or a rise of 1.1°C (2°F) above the patient’s own baseline, may be the only sign of serious infection — and new confusion in an older adult is a vital sign in its own right.
| Red flag from this chapter’s skills | What it may mean | Act now |
|---|---|---|
| New purple or maroon patch over the sacrum or heel, skin intact | Deep tissue pressure injury — can become Stage 4 in days | Offload immediately, notify provider, wound consult, photograph per policy |
| Unilateral calf swelling, warmth, tenderness after immobility | Deep vein thrombosis | Do not massage the limb; keep the patient at rest pending evaluation, notify provider now, anticipate duplex ultrasound — ambulation resumes once anticoagulation is started |
| Sudden dyspnea, pleuritic chest pain, tachycardia, SpO2 drop | Pulmonary embolism | Oxygen, upright position, rapid response call |
| Urine output under 30 mL/hr for 2 hours, or no output from a catheter | Obstruction, hypovolemia or acute kidney injury | Check for kinks and dependent loops, bladder scan, notify provider |
| Stoma dusky, purple or black | Stomal ischemia or necrosis | Notify surgeon immediately — surgical emergency |
| Rigid, board-like abdomen with absent bowel sounds and severe pain | Peritonitis or perforation | NPO, do not give an enema or laxative, urgent provider notification |
| Fall with head strike in a patient on an anticoagulant | Intracranial hemorrhage, possibly delayed | Neuro checks, immediate provider notification, anticipate CT |
| Restrained limb that is cool, dusky, numb or pulseless | Circulatory compromise from the device | Release the restraint immediately, assess, notify provider, document |
The SBAR call. “S — Dr. Reyes, this is Priya Shah, RN on 4 West. I’m calling about Mr. Delacroix in 412. He has a new dusky purple stoma and I’m concerned about stomal ischemia. B — He is post-op day 2 from a sigmoid colectomy with an end colostomy. The stoma was beefy red and budded at 0800 this morning. A — At 1500 the stoma is dark purple across the entire surface, cool to touch, and does not bleed with gentle cleansing. Peristomal skin is intact. No output since 1100. Vitals: BP 148/88, HR 104, RR 20, temp 37.4 C, SpO2 96 percent on room air. Abdomen firm and tender, bowel sounds hypoactive. He rates pain 7/10, up from 3/10. R — I need you to come evaluate the stoma now. I’ve kept him NPO, held the 1600 stool softener, and I have the light and the pouch open for you. Do you want a lactate and a CBC drawn while you’re on your way, and should I notify the on-call surgeon?” Note the structure: one sentence of concern, the relevant history only, hard numbers, and a specific request with a closed-loop read-back at the end.
Verify medications three times against two identifiers, keep catheters and pouches out of trouble with technique rather than luck, remember that the abdomen is auscultated before it is touched, and escalate every red flag with a structured SBAR that ends in a specific request.
The chapter in one breath
The fundamentals are where assessment and intervention become the same act. A bed bath is a full-body skin survey performed clean to dirty with water near 110–115°F, and the sacrum, heels and every device site must be looked at by you, not just by whoever did the washing. Immobility costs about one to one and a half percent of muscle strength per day and drives atelectasis, thromboembolism, orthostasis, constipation and pressure injury, so mobilize by protocol, dangle before standing, and move patients with equipment because the honest one-nurse manual lift limit is 35 pounds. Screen falls with the Morse Scale — 45 or higher is high risk — or a Timed Up and Go of 12 seconds or more, and after a fall assess before moving. Restraints are a last resort with hard order limits: four hours for adults with behavioral restraint, two hours ages 9 to 17, one hour under 9, a face-to-face within one hour, tied to the frame with a quick-release knot. Score Braden from 6 to 23 where lower means worse, stage by the deepest visible tissue, and find Stage 1 in darker skin by temperature, firmness and pain rather than redness. Give medications by the rights with three checks and two identifiers, prevent CAUTI by not placing the catheter, auscultate the abdomen before you percuss or palpate it, and escalate every red flag in SBAR that ends with a specific ask.
Words worth knowing
| Term | What it means |
|---|---|
| Blanchable erythema | Redness that whitens under fingertip pressure and returns; normal reactive hyperemia, resolving within about 30 minutes of offloading |
| Non-blanchable erythema | Redness or darkening that persists under pressure; over a bony prominence with intact skin this is a Stage 1 pressure injury — but purple, maroon or deep red discoloration over intact skin is a deep tissue pressure injury, not a Stage 1 |
| Deep tissue pressure injury | Persistent deep red, maroon or purple discoloration, or a blood-filled blister, from damage at the bone-muscle interface; not assigned a number and may deteriorate rapidly |
| Unstageable pressure injury | Full-thickness loss whose base is obscured by slough or eschar; stage only after debridement, and never debride stable dry eschar on an ischemic heel |
| Braden Scale | Six-subscale pressure-injury risk tool scoring 6 to 23; lower is higher risk, with 18 or below generally considered at risk |
| Shear | Force from skeleton sliding inside the skin, as when the head of bed is raised above 30 degrees; it strangles the sacral microcirculation without visible surface friction |
| Friction | Surface abrasion from dragging skin across linen; prevented with lift sheets and slide devices, never by pulling |
| Orthostatic hypotension | Drop of at least 20 mmHg systolic or 10 mmHg diastolic within 3 minutes of standing; measured supine, then at 1 and 3 minutes standing |
| Morse Fall Scale | Six-item inpatient fall-risk tool scoring 0 to 125; commonly 45 or higher is high risk |
| Timed Up and Go | Rise from a chair, walk 10 feet, turn, return and sit; 12 seconds or longer signals increased fall risk |
| Restraint | Any device, material or drug that restricts free movement and is not standard treatment; requires an order, is never PRN, and is time-limited by age and indication |
| Quick-release knot | The only acceptable restraint knot, tied to a movable bed frame — never a side rail — and releasable with one hand in a single pull |
| Safe patient handling | Program of lifts, slide sheets and team moves built on the 35-pound recommended maximum manual lift for one caregiver |
| Gait belt | Belt applied over clothing with two fingers of room, used from the patient’s weaker side; contraindicated over abdominal incisions, ostomies, chest tubes and pregnancy |
| Rights of medication administration | Patient, drug, dose, route, time, plus documentation, reason, response, refusal and education — verified with three checks and two identifiers |
| Independent double check | Second-nurse verification of high-alert medications such as insulin, heparin and concentrated electrolytes, performed separately and not simply co-signed |
| CAUTI | Catheter-associated urinary tract infection; prevented by avoiding the catheter, closed drainage, bag below bladder, securement and daily necessity review |
| Fecal impaction with overflow | Continuous liquid leakage around a hardened stool mass in a patient with no formed bowel movement; mistaking it for diarrhea and treating with antidiarrheals is dangerous |
| Bristol Stool Form Scale | Seven-type stool descriptor: types 1–2 constipation, 3–4 normal, 5–7 loose to liquid |
| SBAR | Situation, Background, Assessment, Recommendation — the structured escalation format that must end in a specific request |